
Starting a Survey
From the dashboard, click Create a Survey to begin. The platform presents five creation methods on a single screen.
- Build with AI — describe your research goal in plain language; the AI generates a structured survey from your input. The best starting point for most users.
- Build with AI template — choose from a pre-built module template such as Campaign Recall or Concept Testing; the AI generates questions pre-tailored to that study type. You can customise from there.
- Duplicate from My Workspace — copies an existing survey you have already created.
- Copy an Existing Survey — paste in content from an external source.
- Import your Survey — import an XLS survey design file directly.
Build with AI is the best starting point for most users because it turns a plain-language brief into a structured survey in one step.
AI Survey Builder
After selecting Build with AI, you land on the AI Survey Builder screen.
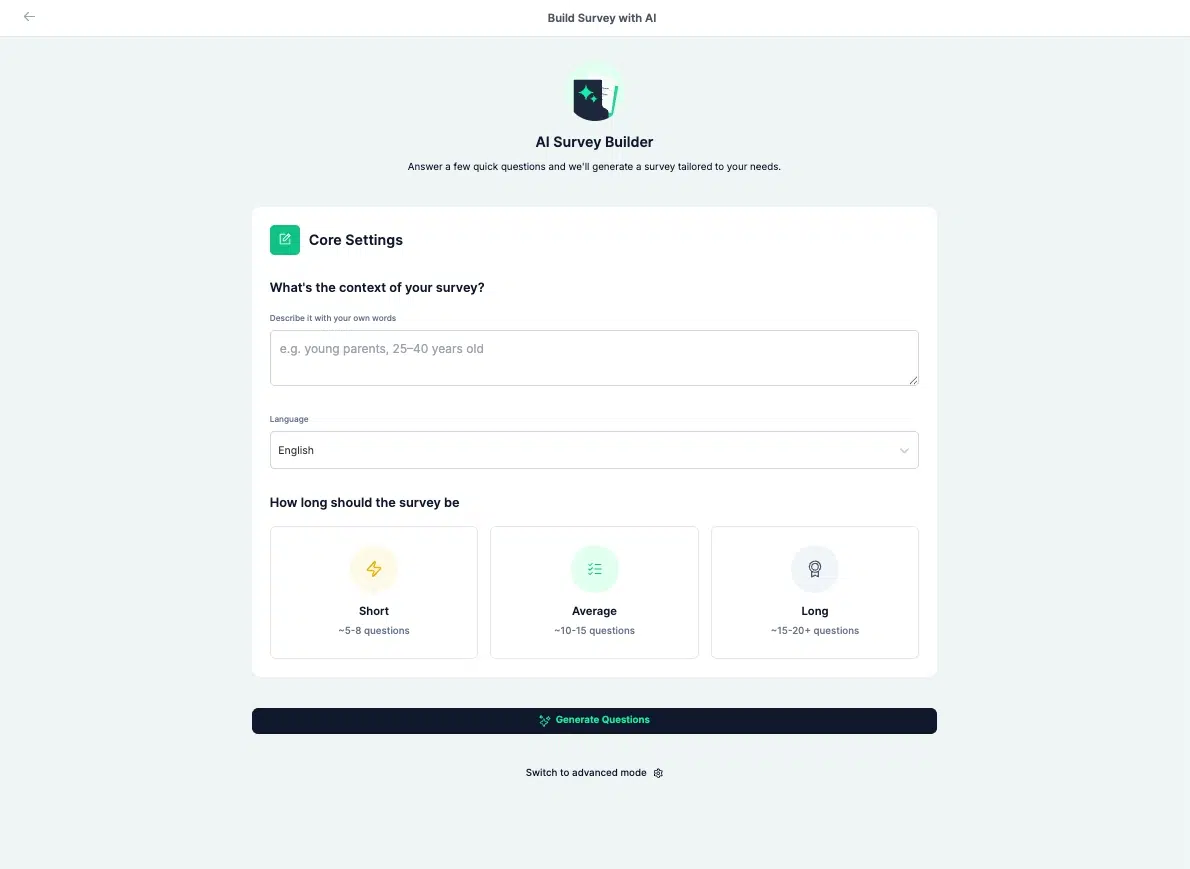
The Core Settings section asks for the context of your survey. Describe your goal in plain language. The more detail you provide, the more precisely the generated questions will match your brief.
Two additional settings matter before generation:
- Language — choose the survey language from the selector.
- Survey length — three options: Short (about 5-8 questions), Average (about 10-15 questions), and Long (about 15-20+ questions). Average is a good default for most studies because it gives enough depth without losing respondent interest.
Click Generate Questions to produce the survey in real time.
If you want more control over generation settings, click Switch to advanced mode before generating.
Question Design Interface
After generation, you land in the Questions Design tab, the first of three tabs in the interface: Questions Design, Share, and Results.

Questions List (Left Panel)
All generated questions appear here. The toolbar at the top shows estimated average completion time, saved status, the add question button (+), settings, and Evaluate, which flags potential issues. The number badge on Evaluate shows how many issues have been detected.
Question Settings Panel (Right Panel)
This panel controls individual question behaviour. Settings available per question include Change Question Type, Randomize, Stacked, Multiple Answers, Allow Other Options, None of the above, All of the above, Follow Up Question, Use Score, Default Answer, Use Logic, Minimum Time, and Maximum Time.
AI Assistant
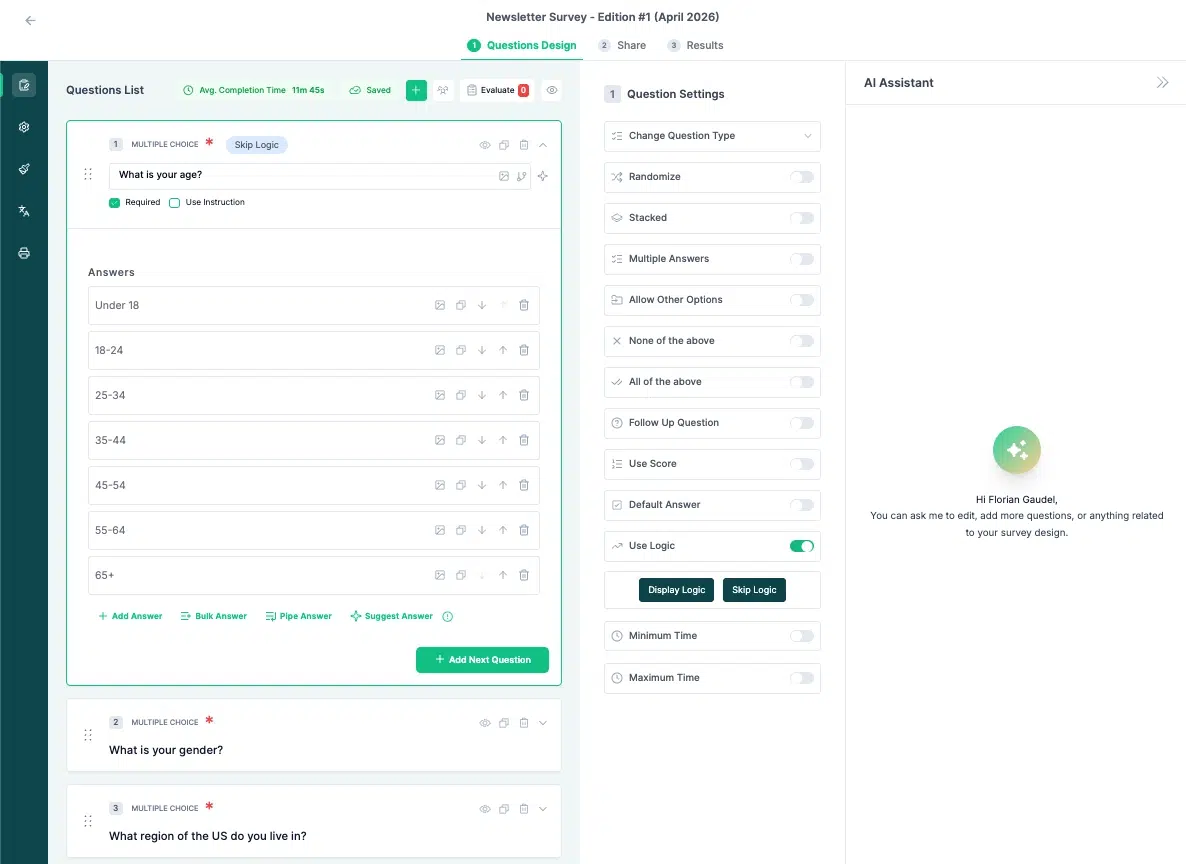
Click Ask Anything at the top right to open the AI Assistant panel. Type plain-language instructions to make edits, for example “Add a few questions about demographics” or “Remove Q1 to Q4.” The AI proposes the change and you confirm before it is applied.
This is often faster than editing questions manually.
Global Settings and Toolbar
The global settings area, accessed via the toolbar, is where you add languages, set sharing preferences, or export a hard copy for review. The top bar also shows estimated completion time, which updates as questions are added, a Preview button to see exactly what respondents will see, and a Collaborate button to invite team members.
After Building Your Survey — Choosing Your Audience
Once the survey is ready, the next step is the Target Audience tab, step 2 of the checkout flow. Here you choose how you want to reach respondents. Three options are available:
- National Representative — a sample balanced across age, gender, region, income, and sometimes ethnicity and education, in the same proportions as the national population.
- Custom Audience — you define your own criteria: country, age range, gender, and any additional screening criteria.
- Bring Your Own Audience (Enterprise only) — use your own respondent list rather than the Standard Insights panel. Selecting this option redirects you to a separate data collection workflow where you distribute the survey yourself, review responses, and push clean data to a report.
Bring Your Own Audience is available to Enterprise users only and routes you into a separate collection workflow rather than the standard panel-based checkout.
See How to Collect Responses and Build Your Report for a full walkthrough of that process.
For National Representative and Custom Audience, the checkout continues through the standard paid funnel. See How to Place an Order for a full walkthrough of the remaining checkout steps.